How to Set Up Your TP-Link AC1900 Router for Xbox One: A Step-By-Step Guide
Hello everyone, Simon here! If you’re keen to set up your TP-Link AC1900 router and need to configure port forwarding for your Xbox One, you’ve come to the right place. Let’s walk through the process step by step to get you up and running in no time.
Setting Up Your TP-Link AC1900 Router
What You’ll Need:
- TP-Link AC1900 Router
- Power cable
- Internet Service Provider (ISP) Cable
- A computer or laptop for the setup
Router Setup Steps:
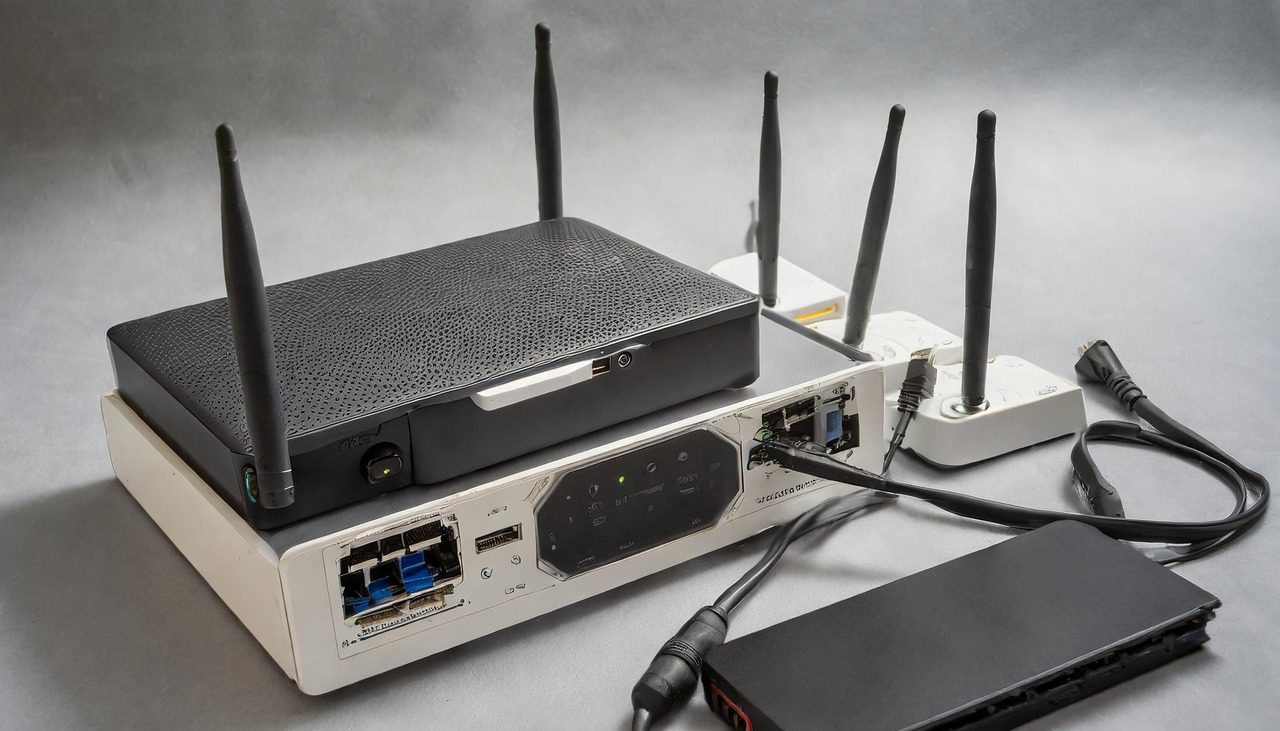
- Power Up: Connect the black power cable to your router and plug it into an electrical outlet.
- ISP Cable Connection: Attach the ISP cable (it can vary in color) to the blue WAN port on your router.
- Local Network Connections: Use the orange LAN ports for connecting devices like your Xbox One, PC, or any other local devices.
Configuring Your Router:
- Access Router Settings: On your computer, launch a browser and navigate to tp-linkwifi.net.
- Create a Router Password: You’ll need to set a password for accessing your router settings.
- Time Zone Selection: Select the time zone that corresponds to your location.
- Internet Connection Type: For most users, ‘Dynamic IP’ is the correct setting. If you’re unsure, confirm with your ISP.
- Wi-Fi Settings: Assign a name and password to your Wi-Fi network.
- Complete the Setup: After reviewing your settings, click ‘Save’ and wait for the router to finalize the configuration.
Configuring Port Forwarding for Xbox One
Finding Your Xbox’s IP Address:
- Router Dashboard: Look under ‘Wired Clients’ or ‘Wireless Clients’ to find your Xbox One and note its IP address.
- Matching MAC Address: If necessary, match the MAC address from your
Xbox One’s network settings with the one listed in your router’s client list to ensure you have the correct device.
Steps for Port Forwarding:
- Access Advanced Settings: In your router’s dashboard, go to the ‘Advanced’ tab.
- Navigate to Port Forwarding: Select ‘NAT Forwarding’, then ‘Virtual Server’.
- Adding Required Ports: For Xbox One, certain ports need to be forwarded to ensure optimal online gaming experience. Here’s how to do it:
- Service Name: Enter a name like ‘Xbox-3074’.
- External Port and Internal Port: Input the specific port number, like 3074.
- IP Address: Enter your Xbox One’s IP address.
- Protocol: Choose between TCP, UDP, or All, based on the port requirements.
Repeat these steps for all necessary ports, which typically include 53, 80, 500, 3544, and 4500.
- Save Settings: After entering each port detail, ensure you click ‘Save’.
Essential Ports for Xbox One:
- 3074 (TCP/UDP)
- 53 (TCP/UDP)
- 80 (TCP)
- 500 (UDP)
- 3544 (UDP)
- 4500 (UDP)
These ports are critical for Xbox Live services, ensuring smooth gameplay and reliable connections.
Wrapping Up
And there you have it – your TP-Link AC1900 router is now fully set up and optimized for your Xbox One gaming sessions
. With these configurations, you should experience improved network performance and fewer connectivity issues while playing online.
Remember, setting up your router and configuring port forwarding might seem technical, but following these steps will make the process manageable. If you encounter any issues or need further clarification, feel free to reach out in the comments below. I’m here to help!
If you found this guide helpful, please give it a like and consider subscribing for more tech tips and tricks. Your support is greatly appreciated!
Happy gaming, and I hope you learned something valuable today. Until next time, take care and enjoy your enhanced gaming experience with your Xbox One!